How to Create Paper-Sized PowerPoint Templates (Tech Tips for Teachers)
Before I even talk about PowerPoint templates, I’m going to be honest… I hate using Microsoft Word. For one, it’s restrictive with where text can go on the page. Also, when I used to use Word, I could never get photos to go where I wanted them to half the time. I’ve been using PowerPoint for all my teaching resource and document creating needs for so long that I can’t even remember how I discovered this tip– but boy, has it been life-changing! *REALLY!* I actually use PowerPoint for resource and file creation way more than for making actual PowerPoint presentations. So if you’re not using PowerPoint yet for all your creation needs, keep reading below to see how to easily set this up with PowerPoint templates!
Now, first off– we aren’t going to be using the normal “blank presentation” template. We need to set up the PowerPoint slide so that it looks like and is the same size as a normal piece of paper.
How to Create PowerPoint Templates (sized like paper)
I promise, it’s really not hard at all to change the size of your PowerPoint slides. To start, open up PowerPoint. Either double click on Blank Presentation or Click New and then Blank Presentation.

Next, hit the “Design” tab at the top. Then click “Slide Size” and “Page Setup”.


After that, you’ll type in for width 8.5 and height will be 11 (inches). Press OK and if it asks you to scale up or down, you can click either (it doesn’t matter).

At this point, you’re nearly there! One thing I like to do before saving the template is get rid of the Title and Subtitle text boxes. That way each time I create a new resource or file it is blank. You can do this by dragging to select both boxes and then just pressing delete.
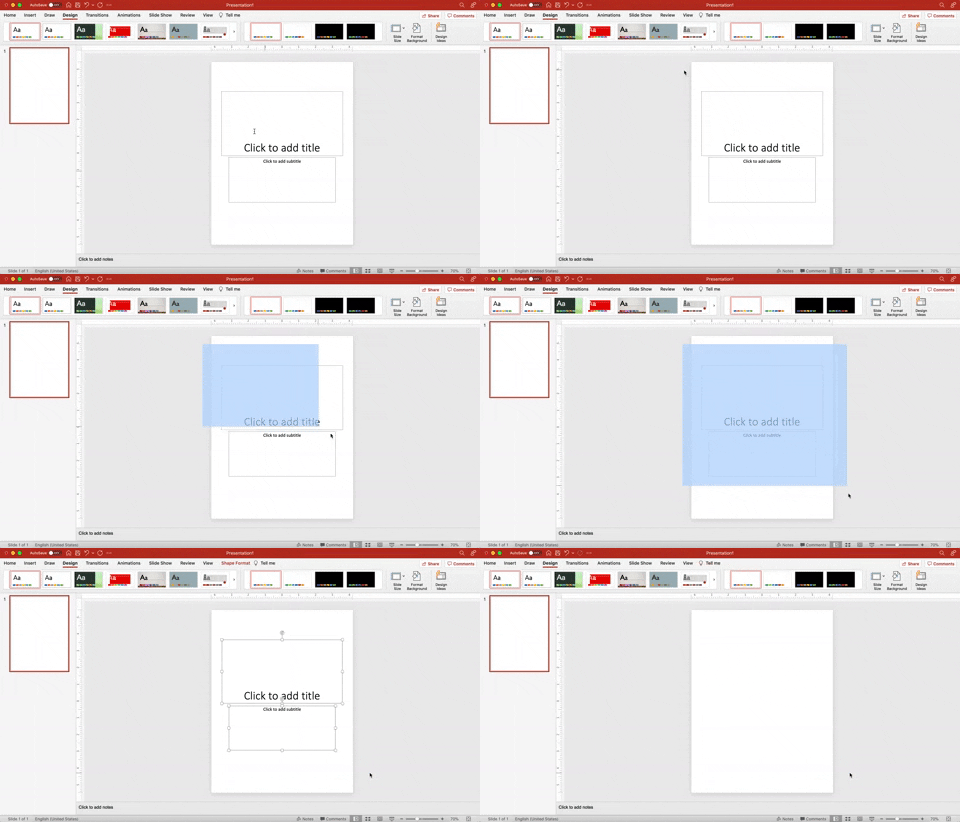
Now you’re finally ready to save. Click File, Save as Template, and then change the name to “portrait” but keep the extension (so it would say– portrait.potx). Click save and voila, you’ve made your first template!

Now, repeat the same process but this time make the size be 11 x 8.5 and save the name as “landscape”.
Now whenever you open up PowerPoint, you can click “new” and then find your PowerPoint templates under the personal section. When you’re already in PowerPoint, you can always open a new file by clicking File, New from Template, and then selecting which one you want. As you can see, you can create other PowerPoint templates of varying sizes depending on your needs– I’ve also made a boom card template I can go more into on a later post.

I hope you’ve found this blog post helpful and you can start creating right away. Like I said, I use this to make teaching resources, parent letters, flyers– you name it! If you have any questions, leave a comment & I’ll try my best to help!
Happy creating!

Want to save this for later?
