Camping Day in First Grade – Classroom Transformation

We all want to make learning engaging for our students, and one theme that is relatively simple to put together is a Camping Day classroom transformation! For the past several years, my first grade team has done a Camping Day in the fall. While it took a little brainstorming at first and more prep the first year, I’ve found the years after take relatively little prep until the afternoon before when we set-up (and we recruit help to set-up)! In this blog post, I’ll walk you through what our set-up for Camping Day is , how the Camping Day activities generally look, and include tips for implementing a Camping classroom transformation!
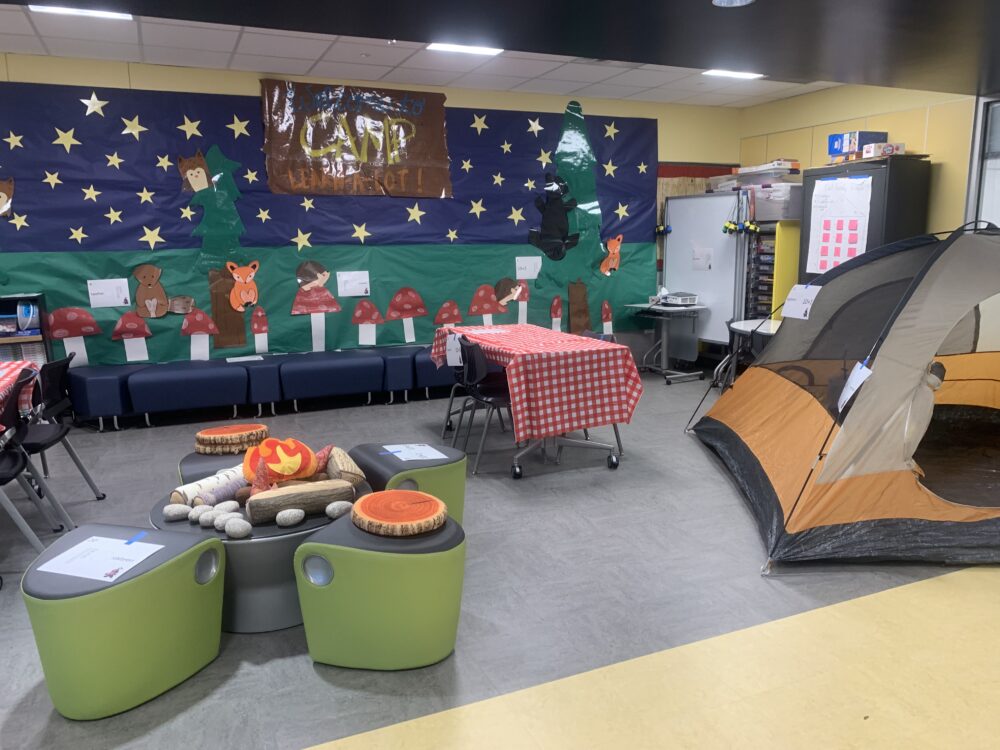
The Set-Up for Camping Day
Our Flex Space
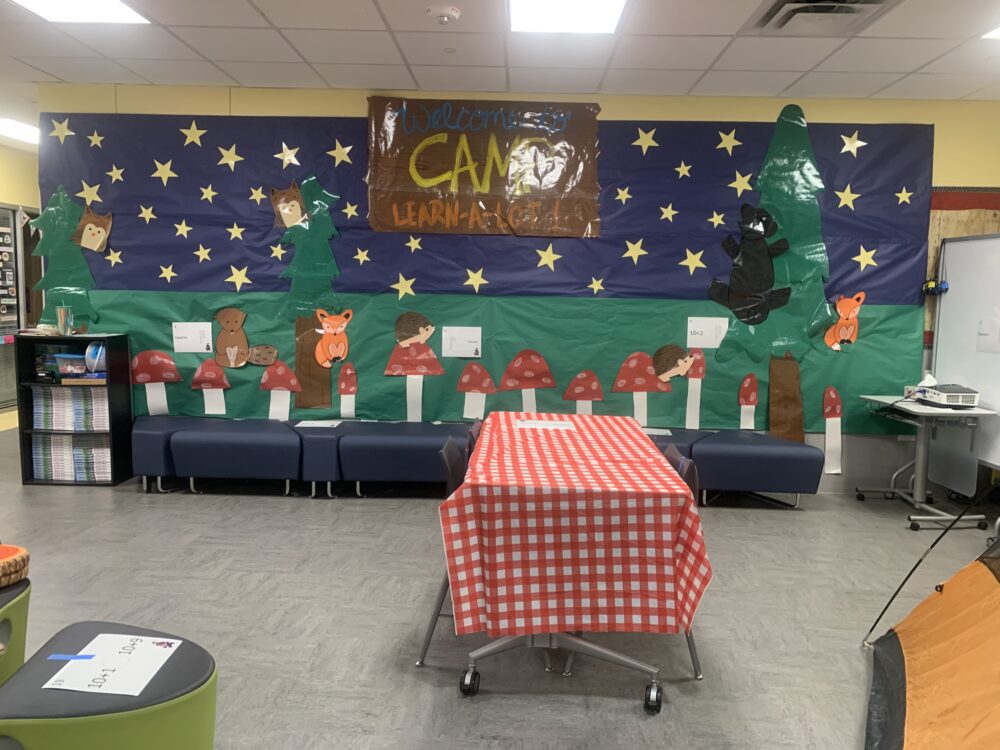
Our grade level does “classroom transformations” a little differently. We do everything as a team together and pretty much the same. So in our case, it kind of looks like a “grade-level transformation” instead. We don’t typically decorate our individual rooms too much. We have what’s called a flex space outside of all our classrooms, and that’s the area we decorate. I love this for a few reasons. First, we can all work together to decorate for fun themed days and then we don’t have to buy or make enough things to fill 3 or 4 classrooms. Also, I’ll be honest that the kids can get a little hyped up on these days so it’s nice to have the classroom stay as is and bring the exciting decorations to the outside flex area.
We tend to use butcher paper as our backgrounds for themed days. For Camping Day, we had an amazing parent the first year we did it help to make a bunch of forest critters and signs to hang in the flex area. These were made on butcher paper as well and laminated so we can use them year after year (I think this is our sixth year using the same decorations). Over the years, we’ve added the stars, some signs that were used from a Camping Themed Scholastic Book Fair that we asked to keep after, and random items either us or parents have brought up that we have and are “camping themed” such as a pillow campfire set. I highly suggest talking to some parents and seeing if any would be willing to help– we have found there’s always more than a few parents willing to lend a helping hand.
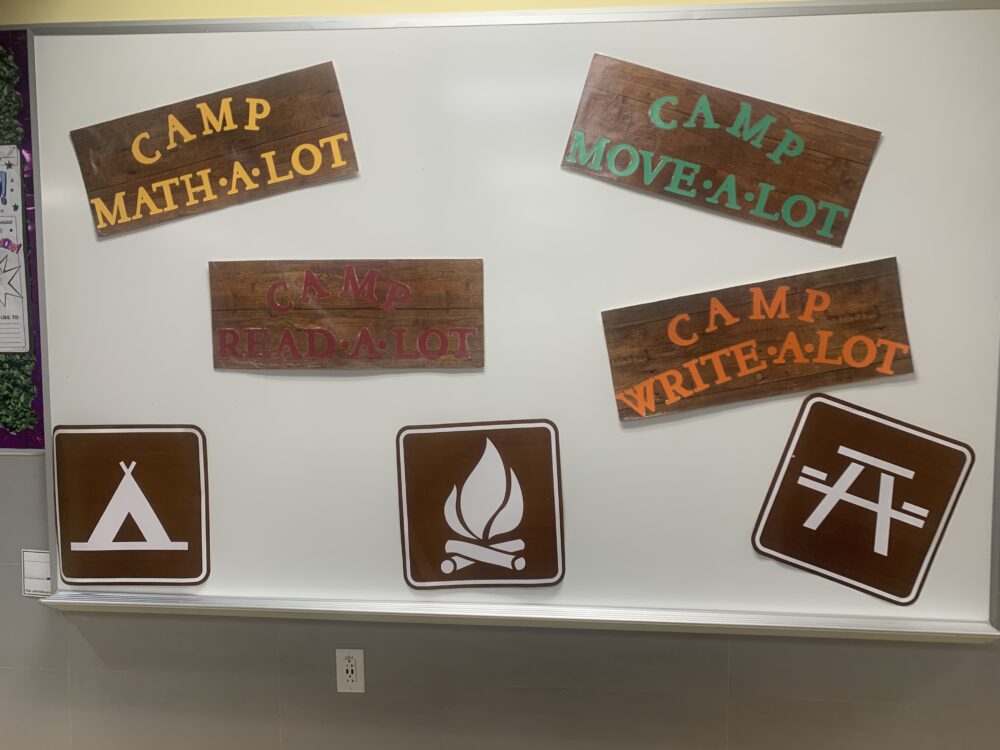
If you’re doing decorations yourself, you could make a little the first year and then add on more each coming year (I know this can be hard, coming from the girl taking the complete OPPOSITE advice and buying ALL the things for our first Christmas in our house this year; however, I speak from experience that prep for these fun days can take a LONG time if you’re not careful, so definitely don’t burn yourself out). One tip for making decorations if you’re not a gifted illustrator like me– hang the butcher paper on your white board with magnets and then shine an image from your projector onto the paper. You can then trace the animal and students will be amazed at your artistic skills!
Classroom Set-Up
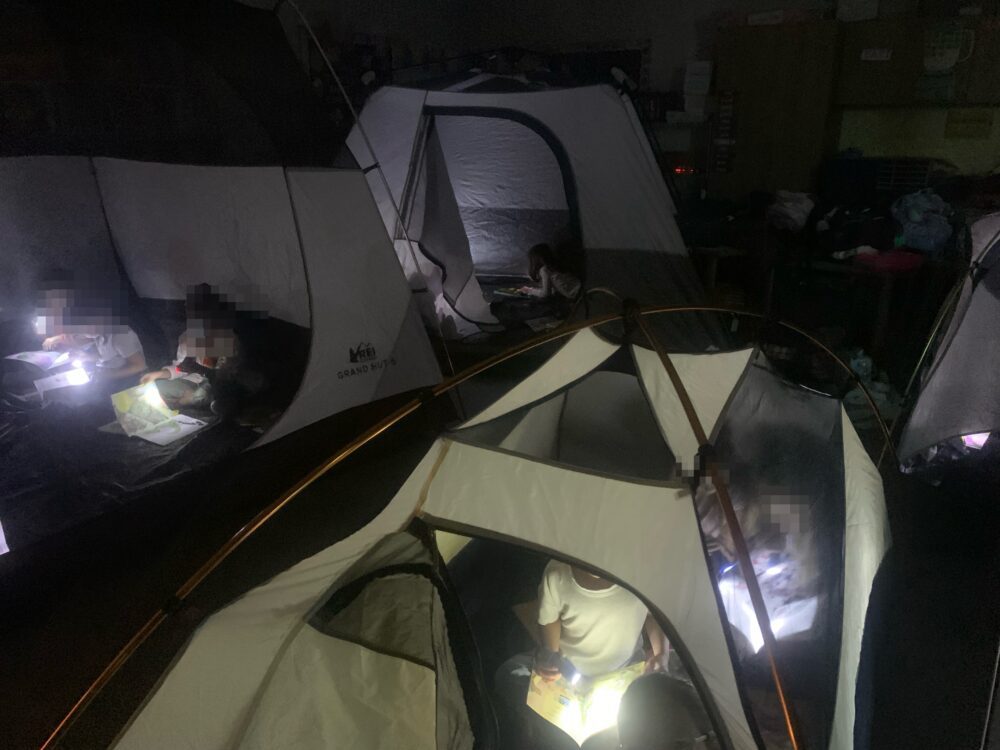
Besides the flex space, the only other place we transform is the classroom we do the reading rotation in (more on that later). We have asked parents for about 6 tents each year and have never had a problem finding enough. My classroom is the one that uses the tents, so we push all my desks to the back/side of the classroom and then put about 4-5 tents in my classroom depending on size (the sixth goes in the flex space as decoration). I will be the first to admit I am NOT a camping person in real-life and after figuring out we had no idea how to set some of these tents up the first time, we now ask parents lending us tents to come help with set-up/take-down. There is room in my class for 2 large tents and 2-3 smaller tents.
We also try to black out my classroom so it will get really dark when the lights go out. I have quite a few windows in my room. We used to cover them with a few layers of black butcher paper which took a while. We then ended up getting black fabric tablecloths off Amazon which have been a total game changer. We simply use a binder clip to secure them to the ceiling tiles and it makes them pretty easy to put up and take down. Depending on the thickness of your table cloth and how much light comes through a window, you might have to double up the tablecloths hanging; however, it is so much easier than butcher paper! These tablecloths have really come in handy and we us them for lots of other theme days for either blacking out rooms (Glow Day) or as a backdrop in the flex space (Arctic Day, March Madness, and a space-themed activity for our Literacy Night).
Camping Day Activities
While we are normally self-contained, on our fun “theme days” we tend to have the kids rotate between the classrooms. It adds a little excitement to the day and it makes it a little easier to manage the different activities. We have had 3 or 4 teachers on the team depending on the year, so we just figure out the timing and decide which subjects get lumped together accordingly.
Camping Day Activities for Reading
I have always done the reading rotation and while the activities have slightly changed over time, the bulk of it stays the same. I always start with a spooky campfire story on the carpet with the lights turned off. Sometimes I have set up a campfire video from YouTube on the projector screen as I read. Since the windows are blacked out in the room for reading, it gets pretty dark! I use a flashlight to read the book Creepy Carrots by Aaron Reynolds. I’ve started using Novel Effect with the read-aloud the past two years ago, and the sound effects have been such an amazing addition. (Be sure to check out Novel Effect if you haven’t ever heard of it or used it– it is truly magical!)
The skill I’ve covered with Creepy Carrots has changed from year to year depending on what we are working on at the time. I’ve done fantasy/realism with the story and picking out parts of the story that is realistic for a rabbit like Jasper and finding parts that are fantasy. We have also focused on making predictions as we read the story. The past two years, we have made connections to the story using a simple reading response prompt. “In the story, _______. This reminds me of ______.” Students typically write that in the story, Jasper was afraid of carrots or was scared since he thought carrots were following him. They then will write about a time that they have been scared. Students then get to make their own “creepy carrot” to go with their reading response and we hang them in the hallway afterwards. Their carrots turn out so cute after, and this activity has really been a hit. You can find tons of templates on TPT to make a carrot, but I used this one which also includes some other activities you might like to incorporate.
After we finish with the story, students get to read in tents. To make everything easier that day, I already have flashlights in each of the tents as well as a variety of books I’ve grabbed from my classroom library in each tent (probably 30 books or so per tent). Students are told they don’t want to disturb the animals in nature by talking in the tents, so they have to read quietly. They LOVE getting to read in the tents! If you don’t want to have tents set up in your room, you could just have students bring a blanket to school and drape it over their desk (stack something heavy on top to hold it down) to have the same effect.
Camping Day Activities for Math
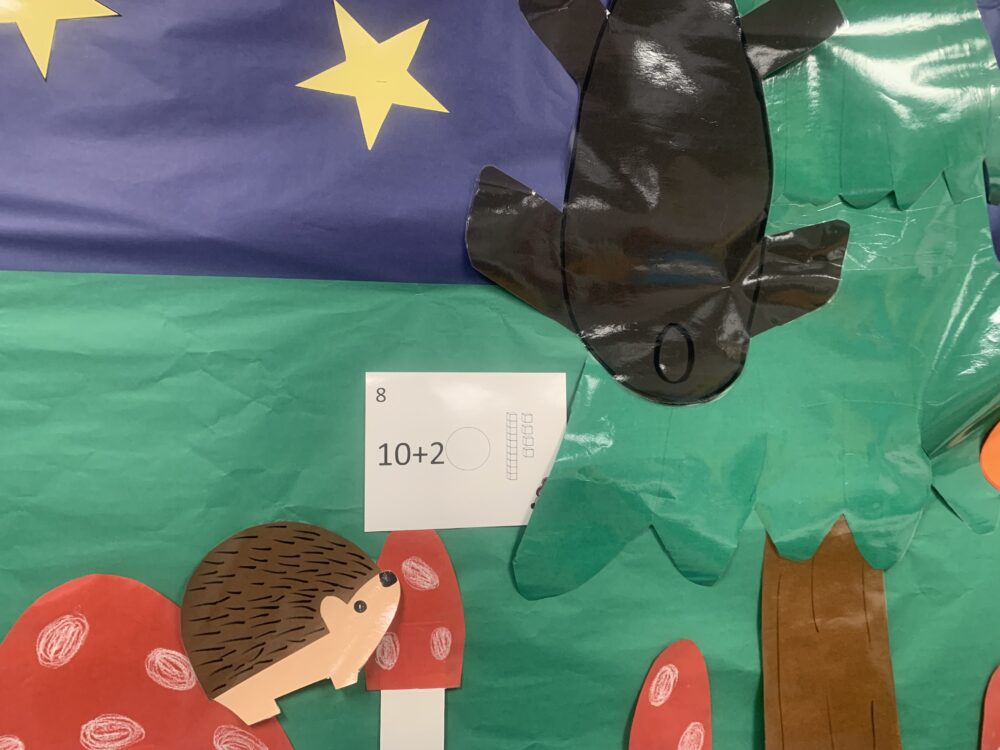
For math our activity has stayed the same each year but the content has changed depending on our curriculum order. After a quick math mini-lesson in the classroom, students are put in partners and then go to the flex space. Signs are hung up in the hallway right by our grade level and the flex space with math problems on them. They do a nature hunt around the flex space and solve different problems on a recording sheet with their partner. Since they are “hunting” for problems, they use binoculars to find them. These are totally unnecessary, but add some novelty to the activity! When we first started out with camping day, we asked parents to send in empty toilet paper rolls, cut them in half, and turned them into binoculars with a string attached. The past few years, we have been able to borrow a set of binoculars from a different grade level to use (and we only need one class set since we rotate the classes through the activities).
In previous years, we had doubles and doubles plus one facts on the signs in the hallway. For example, a sign might have 8 campfires on top and 7 campfires on the bottom. Students would then have to record the math problem and solve as well as check if it was a doubles or doubles plus one fact. After they finished, the got to do a Doubles Plus 1 Boom Card on their iPad for additional practice while others finished up. This year our math curriculum order changed and we were doing teen place value.
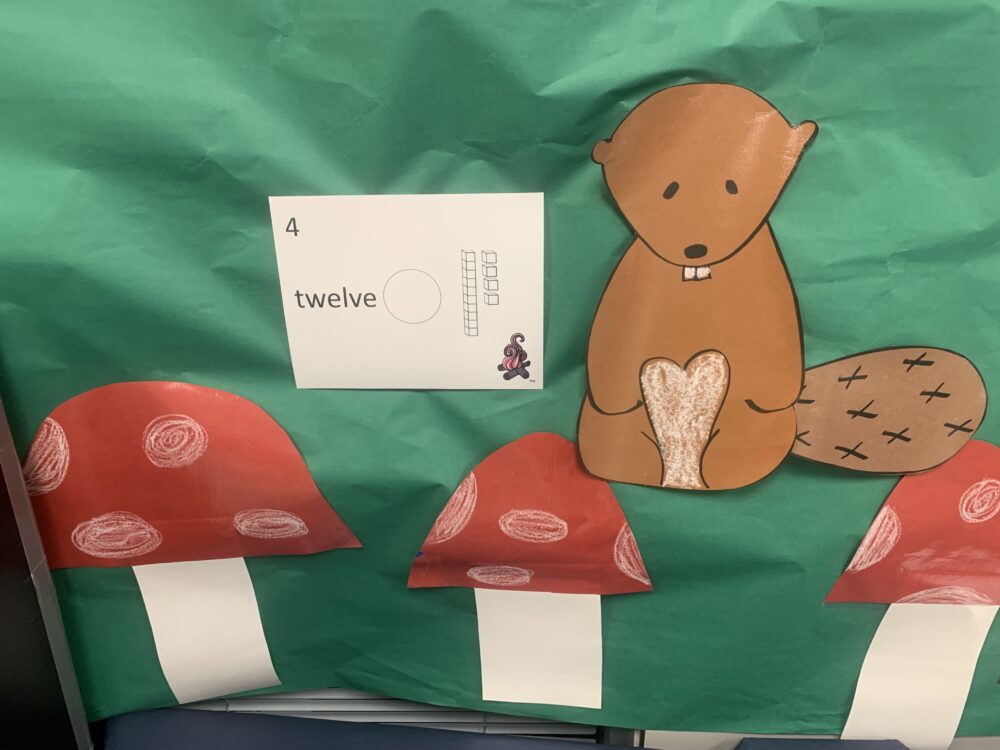
This time, the signs had two numbers shown in different place value forms (expanded form, picture form, standard form, or word form). Students had to write the two numbers from the sign on their recording sheet in standard form and then use the correct comparison symbol (greater than, less than, or equal to) in the middle of the numbers. A camping clipart image was added to each sign just to “go with the theme” but the math problems themselves were not themed, so you really could use almost any concept with this activity! After they finished the scoot, students did a Comparing Teen Numbers Boom Card that also had numbers represented in different forms.
Camping Day Activities for Science
For science, we are usually covering magnets or pattern of movements. One year students went on a “bear hunt” outside and the teacher led them around the playground in pursuit using different patterns of movement (walking slow, running fast, moving in zig zig, going in a straight line, moving back and forth, jumping up and down to search, and so on). She really stressed those vocabulary words for movement and engaged the students in those patterns of movement to make it more engaging.
The past few years we have been doing magnets and students get paired up to race cars. While this isn’t totally camping themed, we call it a “camp game” or “camp race” for students. This is a really memorable activity that really reinforces the concept of attract/repel. Before starting, the class talks about how magnets attract and repel again and what each of those words means. Each student gets a car with a magnet taped to the top and then a magnetic wand.They are then shown how to move their car without touching it and talk about how it actually works. When the magnets repel, the car is pushed forward but if the magnetic wand is turned the other direction, it would just stick to the car and not repel/push it.
Everyone gets to watch each pair race cars and a line with painters tape is put on the ground to indicate how far students race and where they start. After the racing, students then do a journal page and draw their car with a magnet as well as the magnetic wand. They have to label what the poles might be (North on the car and south on the wand, or vice versa) and then write a sentence about why the car moved forward (the magnets repelled).
Camping Day Activities for Writing
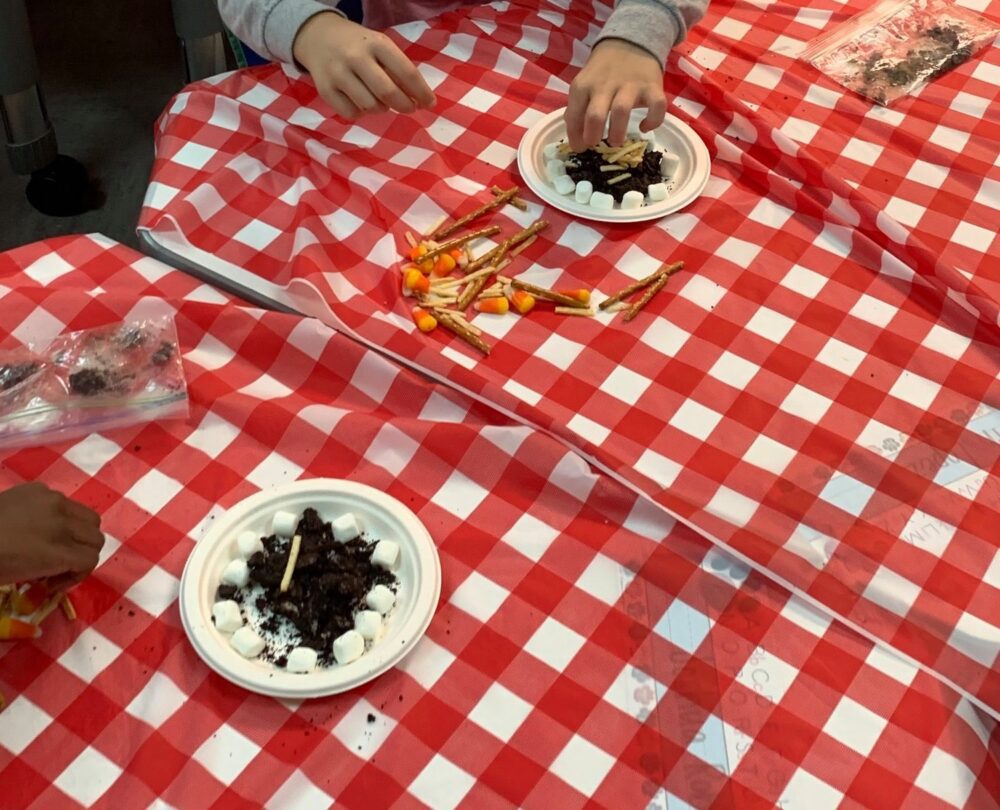
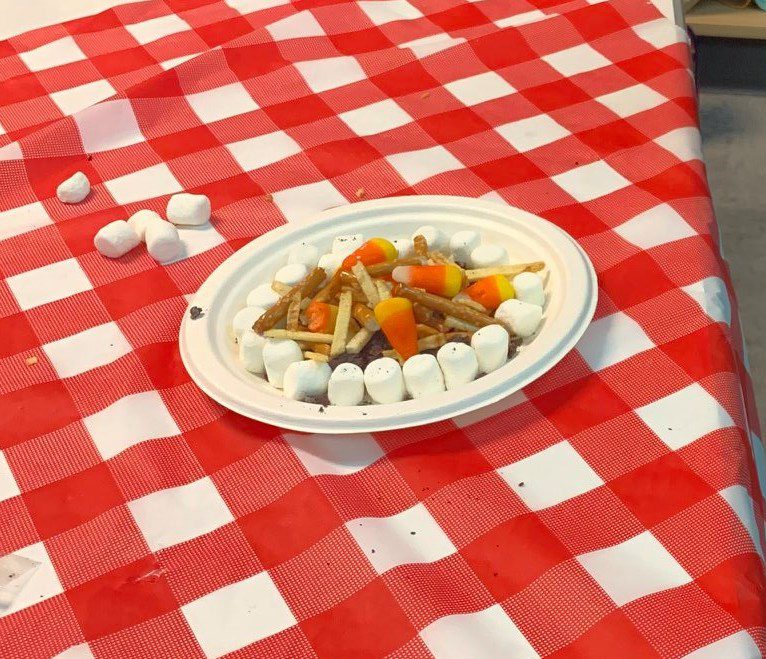
For the writing activity, we have done two different things in the past. The first activity we have done is building a campfire. The teacher would go over the steps to building a campfire a few times with the students and really engage them in remembering the steps. Students would then work in groups to use cut out strips with the steps to building a campfire and work on sequencing them in the correct order. They would then have to decide what sequencing words to use as they retold all the steps (first, next, then, after that, last). Afterwards, students had different food/snack items (marshmallows, crushed oreos, shoe string potatoes, pretzels, candy corn) to represent the different steps and got to make an edible campfire.
After COVID hit, we had to back off of food in the classroom a little, so we shifted to different types of punctuation with camping-themed sentences. The teacher would do a mini-lesson to remind students of the three types of ending punctuation and do some practice questions together. Afterwards, students do either a Seesaw or Camping Punctuation Boom Cards as an independent activity. I think either a Seesaw or Boom Card activity is great for this concept because students can listen to someone saying the sentence to really hear the expression in their voice. This helps students distinguish between the exclamation point and question mark.
Camping Day Awards
Whenever we do a theme day in first grade, we always have awards. They aren’t anything too special, but it is something we remind students of all day long to help encourage good behavior. We just print the award on a piece of cardstock and the teacher signs her name at the bottom as “camp counselor”. We have done camping day awards at the end of the day as a grade level or just in each classroom. Since we rotate students through the different camping day activities, the teachers all talk during the day to decide who was working hard and should get an award in each class. We typically have a “best dressed” award for a boy and a girl from each class who really dressed to the theme. We have an award for each content area per class (a quiet reader award, the “Greatest” Comparer award for math, a super racer for someone who showed good sportsmanship in science, etc.)
Closing Thoughts
I hope this has given you some ideas about how you could put together a camping day in your own classroom/grade level! Once you spend the time thinking it through the first year and maybe getting a few supplies, it is something you can easily implement again and again each year. We store all our decorations in an under the bed container that we then just stack on top of our cabinets until we need it the next year. The one thing I have learned is don’t be afraid to ask for help in putting these theme days together– we are so lucky to always have some parents who want to help out! It only takes about 30-45 minutes with the help of a few parents to get everything set up the afternoon before and everything taken down the afternoon of camping day after dismissal.
Happy Camping!

Want to pin this for later?


