Tech Tips for Teachers: How To Organize Your Fonts (Mac)
I recently realized after getting a new school laptop and having to transfer all my fonts over that I *might* have too many fonts. While I’ll eventually go through and delete some fonts, there’s an easy way to organize your fonts and save all your most-used and favorite fonts in a special place on your Mac: font collections.
What Is a Font Collection?
In Font Book on Mac, you can create different collections of fonts that appear at the top when creating resources in PowerPoint. Think of it as a playlist, but for your fonts! If I use certain fonts all the time when creating worksheets, teaching resources, etc., I can put those on my “playlist” so I don’t have to scroll through my 1000+ fonts. Even better, if you use a font a lot that alphabetically falls at the bottom of your font list, you can access it much faster by putting it in a collection.

How to Organize Your Fonts in Font Collections
Here’s how to organize your fonts:
- First, you’re going to want to find the Font Book application (mine was in my launchpad).
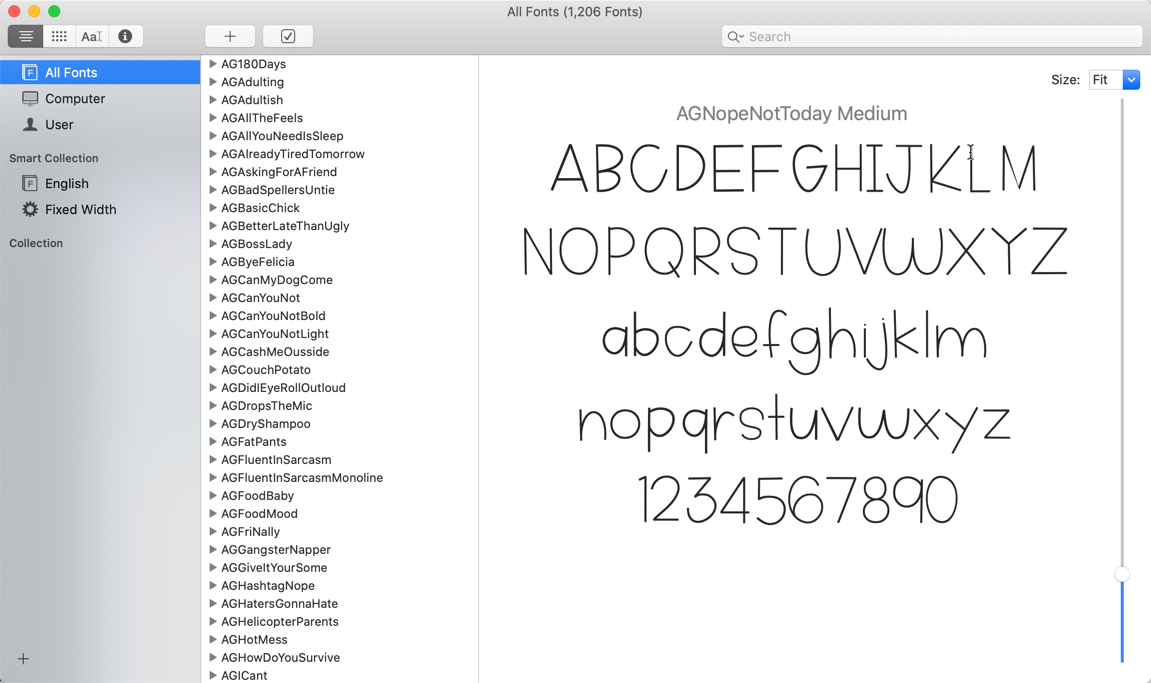
2. After opening Font Book, you’ll see all your fonts listed.
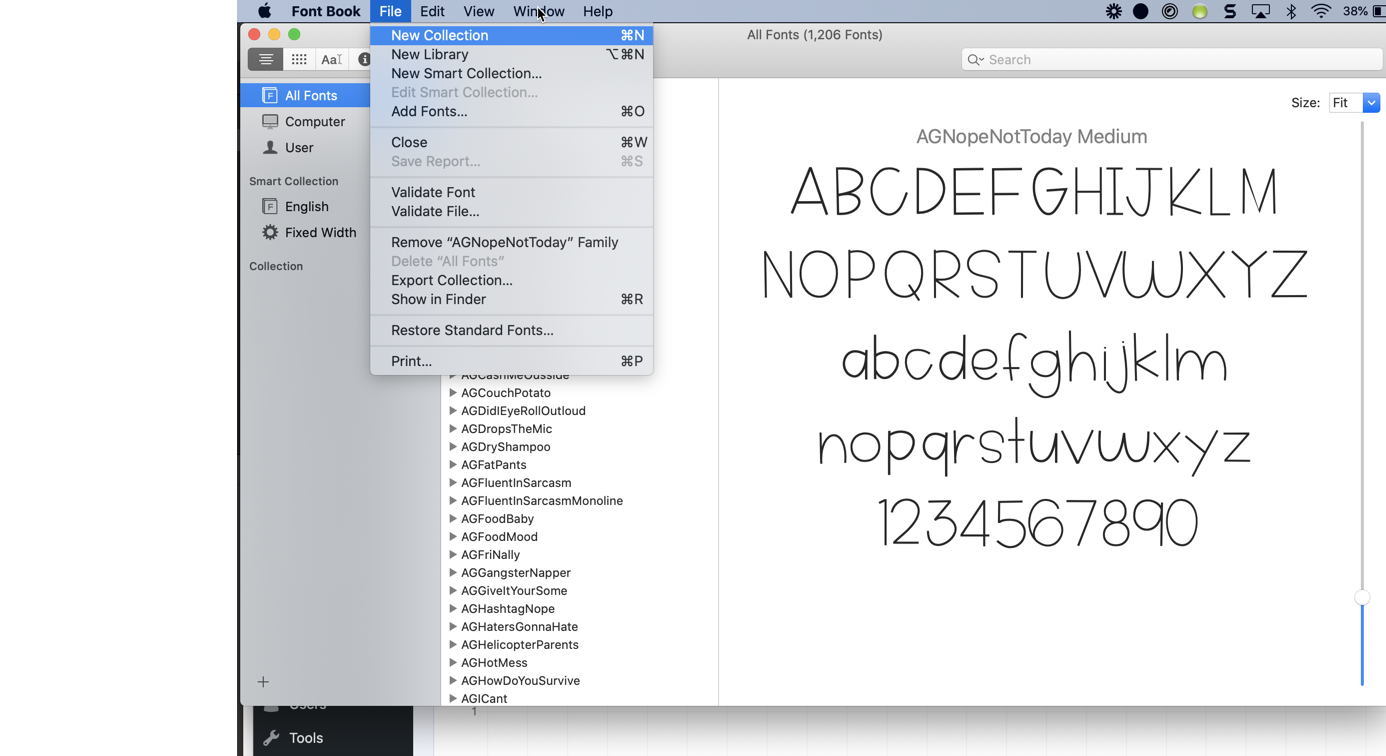
3. Next you’ll want to click file, new collection.

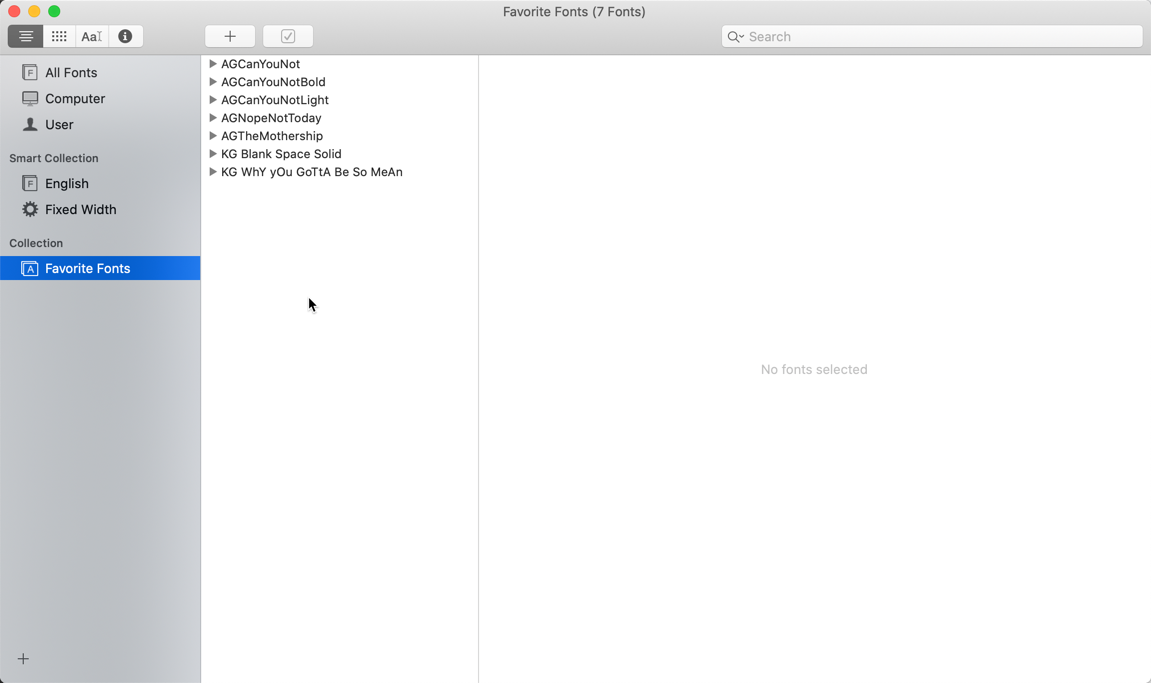
4. You’ll then be given the ability to type out a name for your new collection. I went with “favorite fonts” for the name of my collection. You could have a collection for easy to read fonts, fonts you use for making worksheets or resources, etc.
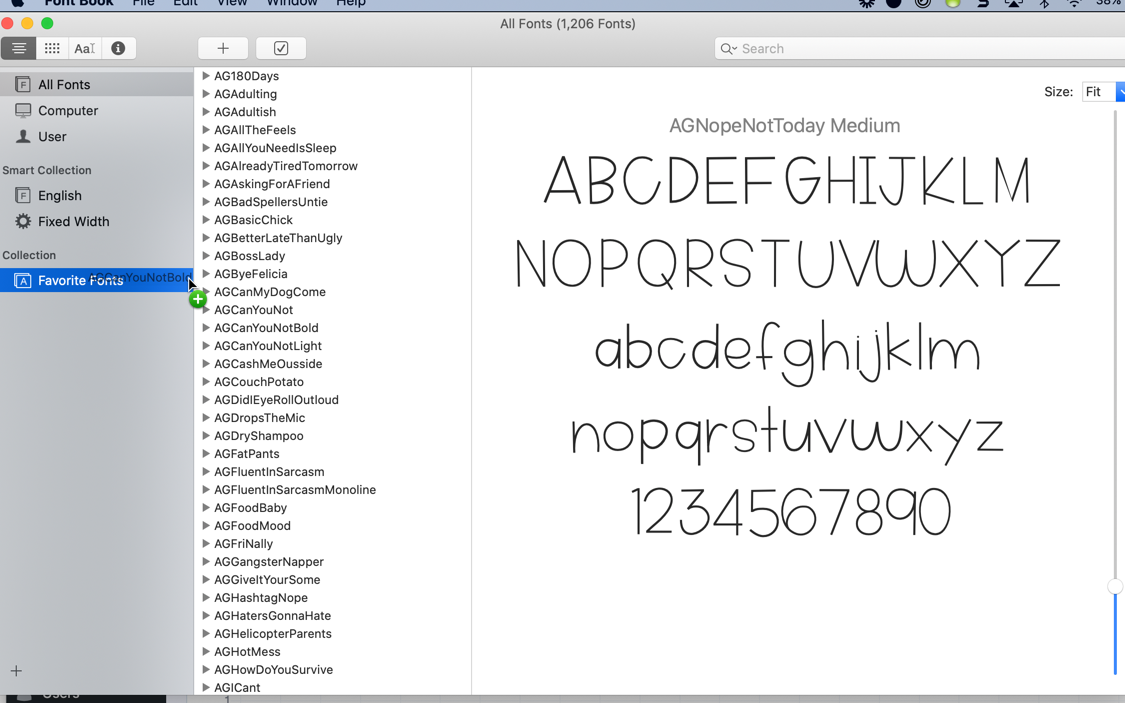
5. Adding to your font collection is easy. Go back to the top and click on “All Fonts”. Then click and drag on fonts that you want to add to your collection and drop them over the name. You’ll see the green + sign come up as you do that for it to be added.
6. When you click on the name of your font collection, it’ll show you all the fonts you have added so far. You can always delete one if you accidentally drag it over.
How Do I Access My Font Collection?
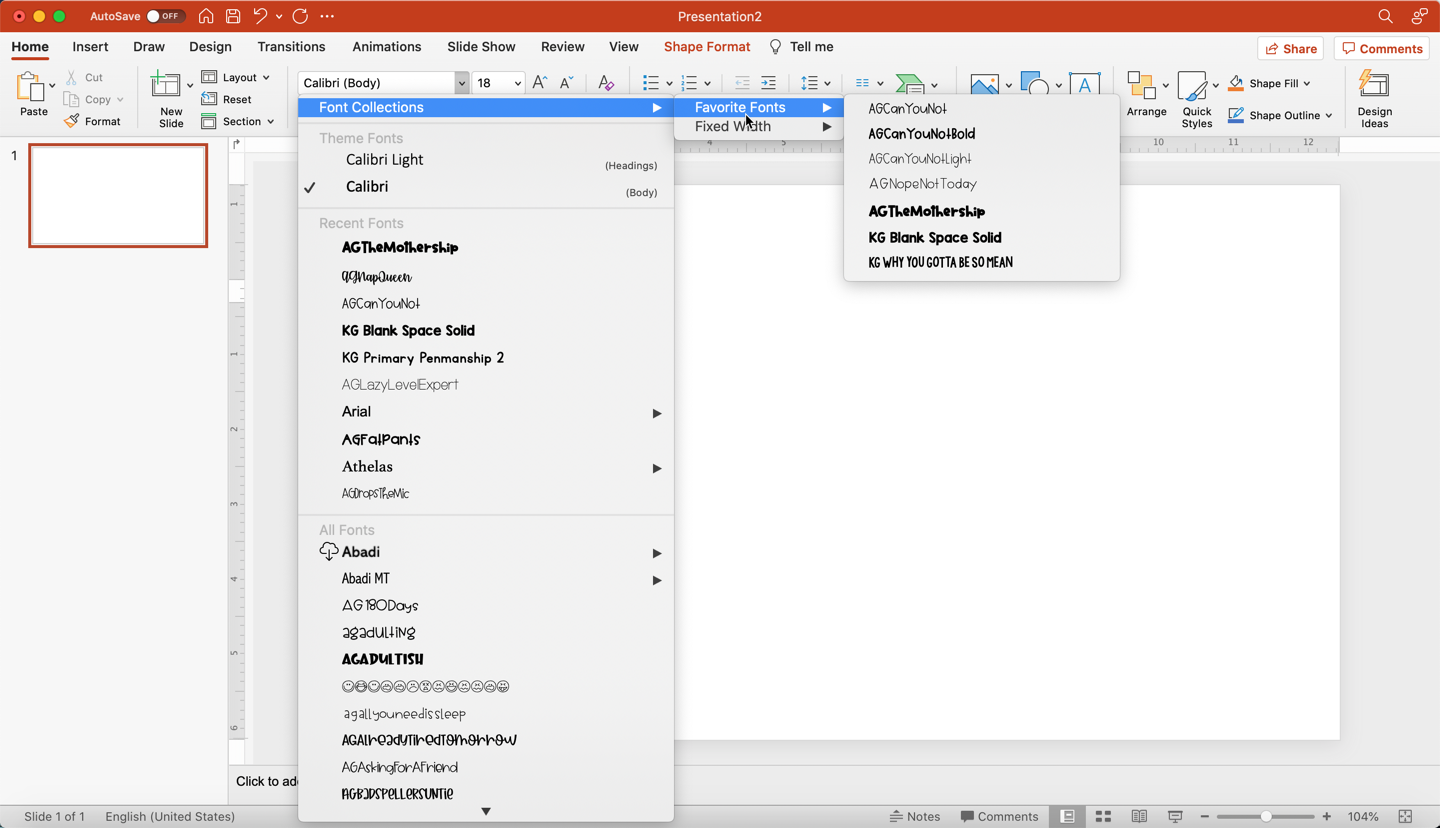
Once you’ve dragged over any fonts in Font Book, the “hard” part is done. Now you can go to whatever program you are using, such as PowerPoint, to access the collection. If you were already using PowerPoint and it’s up and running, you might need to quit PowerPoint. You can do this by right clicking on the icon at the bottom of your screen and pressing “quit”. When you re-open PowerPoint, your collection should then appear with your fonts.
Finally, to view your new font collection, create a text box and click the arrow to change the font. You’ll see at the very top it says “Font Collections” and then you see my collection I just created “Favorite Fonts”. Simply click on the font you want to use and you’re ready to go!
I hope you find this tutorial helpful and that you are able to easily organize your fonts! Let me know if you end up creating any font collections. If you have any questions, leave a comment below!

Want to pin this for later?
